Verseで参照
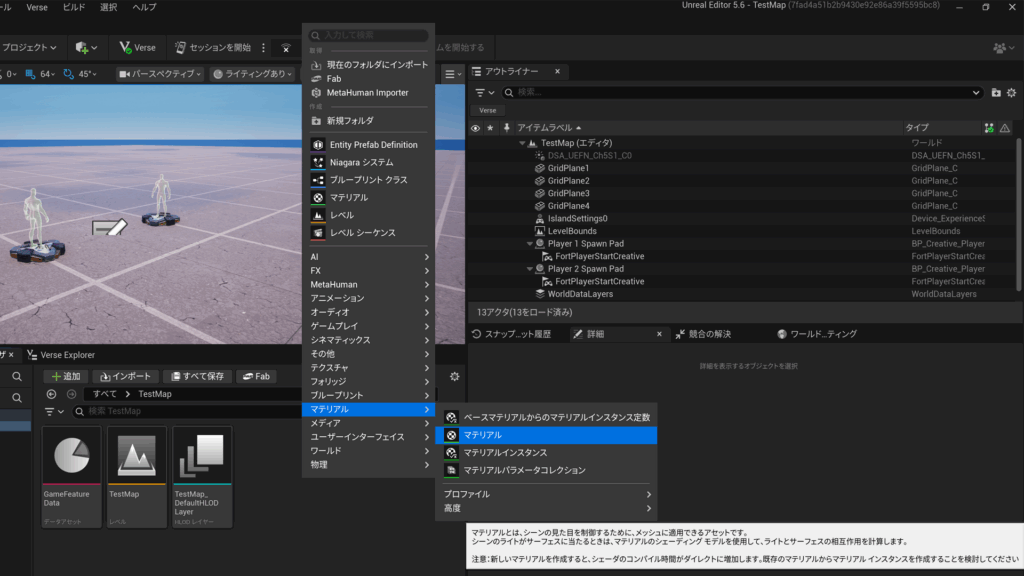
マテリアルを作成します。コンテンツブラウザから右クリックをして「マテリアル > マテリアル」を選択します。
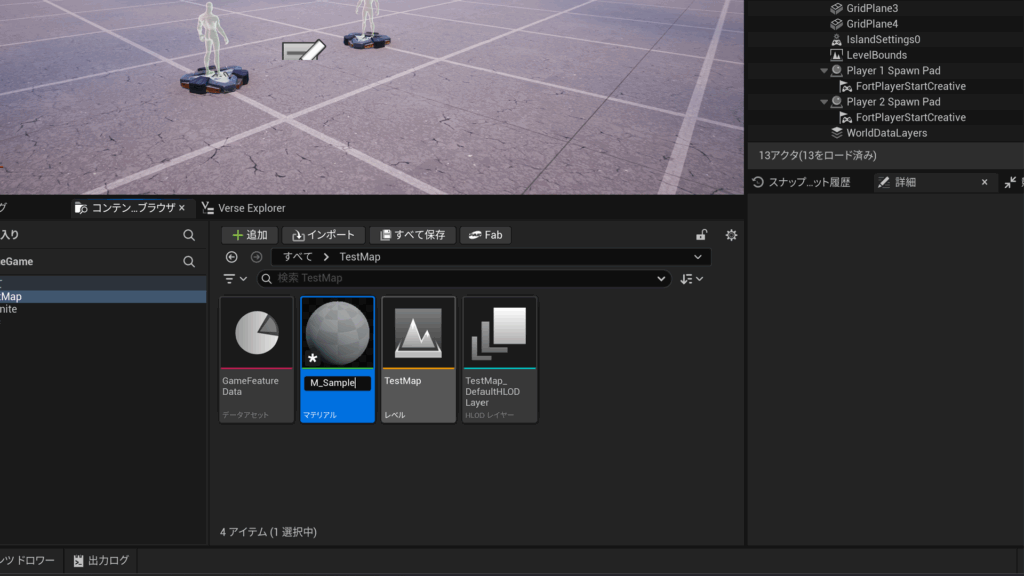
名前を決めるのですが、ここでの名称がVerseで参照する際の「型」となります。
using {/Verse.org/Assets}
M_Sample<scoped {/gorosuke@fortnite.com/TestMap}> := class<final><scoped {/gorosuke@fortnite.com/TestMap}>(material):
Verseコードをビルドすると、「Assets.digest.verse」に上記のようなコードが生成されているはずです。
NewMaterial := M_Sample{}
SampleProp.SetMaterial(NewMaterial)
詳細は後述するのですが、公開されたマテリアルクラスはVerseコード内で動的にインスタンス化することができます。実際にSetMaterialなどをする際もインスタンス化したのちにその変数を渡します。
マテリアルパラメータ
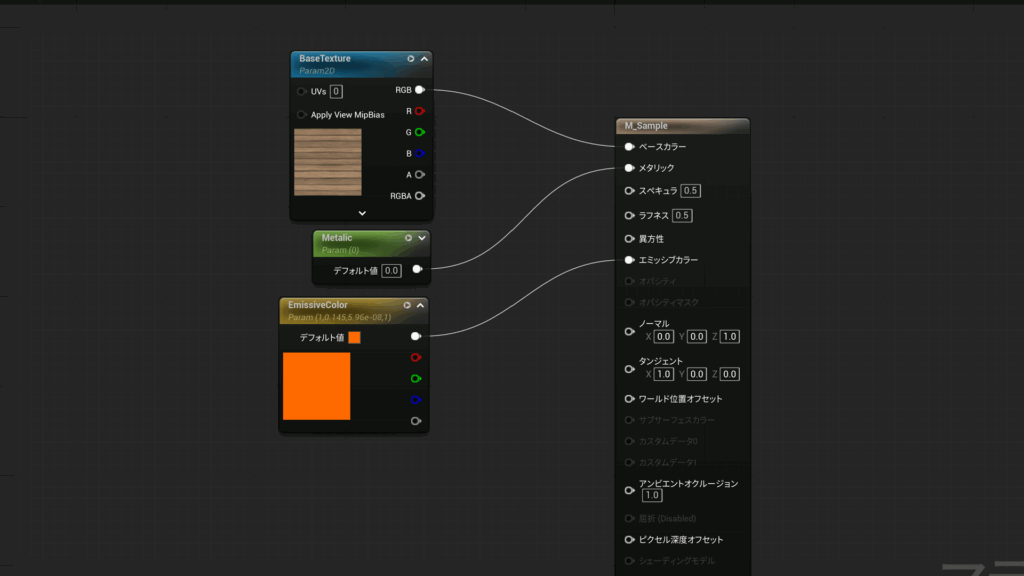
マテリアル内でパラメータを用意してVerseコードをビルドすると
using {/Verse.org/Colors}
using {/Verse.org/Simulation}
using {/Verse.org/Assets}
M_Sample<scoped {/gorosuke@fortnite.com/TestMap}> := class<final><scoped {/gorosuke@fortnite.com/TestMap}>(material):
    @editable
    var Metalic<public>:float = external {}

    @editable
    var EmissiveColor<public>:color = external {}

    var BaseTexture<public>:texture = external {}
クラス側の方にパラメータと一致する変数が用意されます。これらの変数の値を変えることで、マテリアル内のパラメータの値も変わるというわけです。
NewMaterial := M_Sample{}
SampleProp.SetMaterial(NewMaterial)
set NewMaterial.Metalic = 0.5 #メタリックを0.5に変更
実際にコードとして使用する際も上記のように、インスタンス化されたマテリアルに対して「set XXX.ParameterName = Value」とします。
小道具に反映
using { /Fortnite.com/Devices }
using { /Verse.org/Simulation }
using { /Verse.org/Colors }
using { /Verse.org/Random }

sample_device := class(creative_device):

    @editable
    TargetProp:creative_prop = creative_prop{}

    @editable
    ChangeColorButton:button_device = button_device{}

    InstancedMaterial:M_Sample = M_Sample{}

    OnBegin<override>()<suspends>:void=
        TargetProp.SetMaterial(InstancedMaterial)
        ChangeColorButton.InteractedWithEvent.Subscribe(OnInteractChangeColor)

    OnInteractChangeColor(InAgent:agent):void=
        set InstancedMaterial.BaseColor = color:
            R := GetRandomFloat(0.0, 1.0)
            G := GetRandomFloat(0.0, 1.0)
            B := GetRandomFloat(0.0, 1.0)
まずは、すでに設置済みの小道具に対してパラメータを調整する方法についてです。
creative_prop自身はデフォルトで持っているマテリアルを取得する関数などは用意されていません。そのため、SetMaterial関数でVerse内で生成したマテリアルで上書きをしてあげることで、パラメータ調整ができるようになります。
using { /Fortnite.com/Devices }
using { /Verse.org/Simulation }
using { /Verse.org/Colors }
using { /Verse.org/Random }
using { /Fortnite.com/Characters }

sample_device := class(creative_device):

    @editable
    TargetPropAsset:creative_prop_asset = DefaultCreativePropAsset

    @editable
    SpawnButton:button_device = button_device{}

    @editable
    ChangeColorButton:button_device = button_device{}

    InstancedMaterial:M_Sample = M_Sample{}

    OnBegin<override>()<suspends>:void=
        SpawnButton.InteractedWithEvent.Subscribe(OnInteractSpawn)
        ChangeColorButton.InteractedWithEvent.Subscribe(OnInteractChangeColor)

    OnInteractChangeColor(InAgent:agent):void=
        set InstancedMaterial.BaseColor = color:
            R := GetRandomFloat(0.0, 1.0)
            G := GetRandomFloat(0.0, 1.0)
            B := GetRandomFloat(0.0, 1.0)

    OnInteractSpawn(InAgent:agent):void=
        if(FortCharacter := InAgent.GetFortCharacter[]):
            SpawnResult := SpawnProp(TargetPropAsset, FortCharacter.GetTransform())
            if(SpawnedProp := SpawnResult(0)?):
                SpawnedProp.SetMaterial(InstancedMaterial)
SpawnPropで動的に小道具を生成する場合でも同様に、スポーンされた小道具に対してSetMaterialを行います。InstancedMaterialを共通で渡しているため、InstancedMaterial内の値を変更するとスポーンした全部の小道具のパラメータが切り替わるはずです。
もしスポーンさせた小道具ごとに分けたい場合などは、SpawnPropごとにM_Sampleのインスタンスを作成して管理しましょう。
UIに反映
using { /UnrealEngine.com/Temporary/UI }
using { /UnrealEngine.com/Temporary/SpatialMath }
using { /Verse.org/Colors }

material_widget_sample := class:

    MaterialBlock:material_block = material_block:
        DefaultImage := M_Sample{}
        DefaultDesiredSize := vector2{X := 256.0, Y := 256.0}

    UpdateColor(InColor:color):void=
        if(TargetMaterial := M_Sample[MaterialBlock.DefaultImage]):
            set TargetMaterial.BaseColor = InColor

    CreateCanvas():canvas=
        canvas:
            Slots := array:
                canvas_slot:
                    Anchors := anchors:
                        Minimum := vector2{X := 0.5, Y := 0.5}
                        Maximum := vector2{X := 0.5, Y := 0.5}
                    Alignment := vector2{X := 0.5, Y := 0.5}
                    SizeToContent := true
                    Widget := MaterialBlock
UIで使用する場合はmaterial_blockを使用します。ただ、UIの実装は人によってそれぞれ方針などもあるでしょうから、今回は一例として簡単に紹介します。
UpdateColor関数ではマテリアルパラメータを調整するように処理を書いているのですが、今回はmaterial_block内のDefaultImageを直接参照しています。DefaultImageはすべてのマテリアルの親クラスでもある「material」であるため、対象のマテリアルでキャストしてあげ、そのif内でパラメータを調整する感じとなります。
一応、キャストの仕様としてDefaultImageにM_Sample以外のマテリアルが入っていた場合は、ifが失敗してパラメータの調整はできなくなります。
using { /UnrealEngine.com/Temporary/UI }
using { /UnrealEngine.com/Temporary/SpatialMath }
using { /Verse.org/Colors }

material_widget_sample := class:

    MaterialBlock:material_block = material_block:
        DefaultImage := M_Sample
        DefaultDesiredSize := vector2{X := 256.0, Y := 256.0}

    InstancedMaterial:M_Sample = M_Sample{}

    UpdateColor(InColor:color):void=
        set InstancedMaterial.BaseColor = InColor

    CreateCanvas():canvas=
        MaterialBlock.SetImage(InstancedMaterial)
        canvas:
            Slots := array:
                canvas_slot:
                    Anchors := anchors:
                        Minimum := vector2{X := 0.5, Y := 0.5}
                        Maximum := vector2{X := 0.5, Y := 0.5}
                    Alignment := vector2{X := 0.5, Y := 0.5}
                    SizeToContent := true
                    Widget := MaterialBlock
少し蛇足にはなりますが、SetImageでマテリアルをセットしたのちに、変数化したマテリアルに対してパラメータ調整する方法も紹介します…。一応、こんな方法もあるんだなくらいでよいですが、特に理由がなければひとつ前に紹介したDefaultImageを参照する方法がオススメです。
シーングラフ
# Module import path: /gorosuke@fortnite.com/TestMap/Meshes
Meshes := module:
    SM_Sample<scoped {/gorosuke@fortnite.com/TestMap}> := class<final><scoped {/gorosuke@fortnite.com/TestMap}>(mesh_component):
        @editable
        var Material_0<public>:material = external {}

    SM_Sample_asset<scoped {/gorosuke@fortnite.com/TestMap}>:mesh = external {}
シーングラフではスタティックメッシュに対して、マテリアルスロットに対応した変数付きのmesh_componentが生成されます。
using { /Fortnite.com/Devices }
using { /Verse.org/Simulation }
using { /Verse.org/Colors }
using { /Verse.org/Random }
using { /Verse.org/SceneGraph }
using { Meshes }

sample_component := class<final_super>(component):

    var MaybeMeshComponent:?SM_Sample = false
    InstancedMaterial:M_Sample = M_Sample{}

    OnBeginSimulation<override>():void=
        if(MeshComponent := Entity.GetComponent[SM_Sample]):
            set MaybeMeshComponent = option{MeshComponent}
            set MeshComponent.Material_0 = InstancedMaterial

    OnSimulate<override>()<suspends>:void=
        loop:
            Sleep(1.0)
            set InstancedMaterial.BaseColor = color:
                R := GetRandomFloat(0.0, 1.0)
                G := GetRandomFloat(0.0, 1.0)
                B := GetRandomFloat(0.0, 1.0)
マテリアルスロット[0]に設定したい場合は、set MeshName.Material_0 = XXXと渡してあげるだけで大丈夫です。あとは、小道具やUIの操作と同様にマテリアルのインスタンスに対して色をセットするなどの操作をしましょう。
シーングラフ有効化前
using {/Verse.org/Colors}
using {/Verse.org/Simulation}
using {/Verse.org/Assets}
M_Sample_material<scoped {/gorosuke@fortnite.com/TestMap}> := class<final><scoped {/gorosuke@fortnite.com/TestMap}>(material):
    @editable
    var Metalic<public>:float = external {}

    @editable
    var EmissiveColor<public>:color = external {}

    var BaseTexture<public>:texture = external {}

M_Sample<scoped {/gorosuke@fortnite.com/TestMap}>:material = external {}
シーングラフを有効にしていないプロジェクトの場合にはマテリアルの生成に若干の違いが発生します。例えば、クラス定義では「_material」と付け足されていたり、パラメータを持たない純粋なM_Sample変数が生成されたり。
using { /Fortnite.com/Devices }
using { /Verse.org/Simulation }
using { /Verse.org/Colors }
using { /Verse.org/Random }

sample_device := class(creative_device):

    @editable
    TargetProp:creative_prop = creative_prop{}

    @editable
    ChangeColorButton:button_device = button_device{}

    OnBegin<override>()<suspends>:void=
        TargetProp.SetMaterial(M_Sample)
マテリアルパラメータを使用せず、単純に小道具のマテリアルを上書きしたいだけであれば「_material」を使用しないインスタンス済みのモノを使用できました。
これらをコード側で使用した状態でシーングラフを有効にすると「存在しない○○」というエラーとともに生成が消されてしまいます。
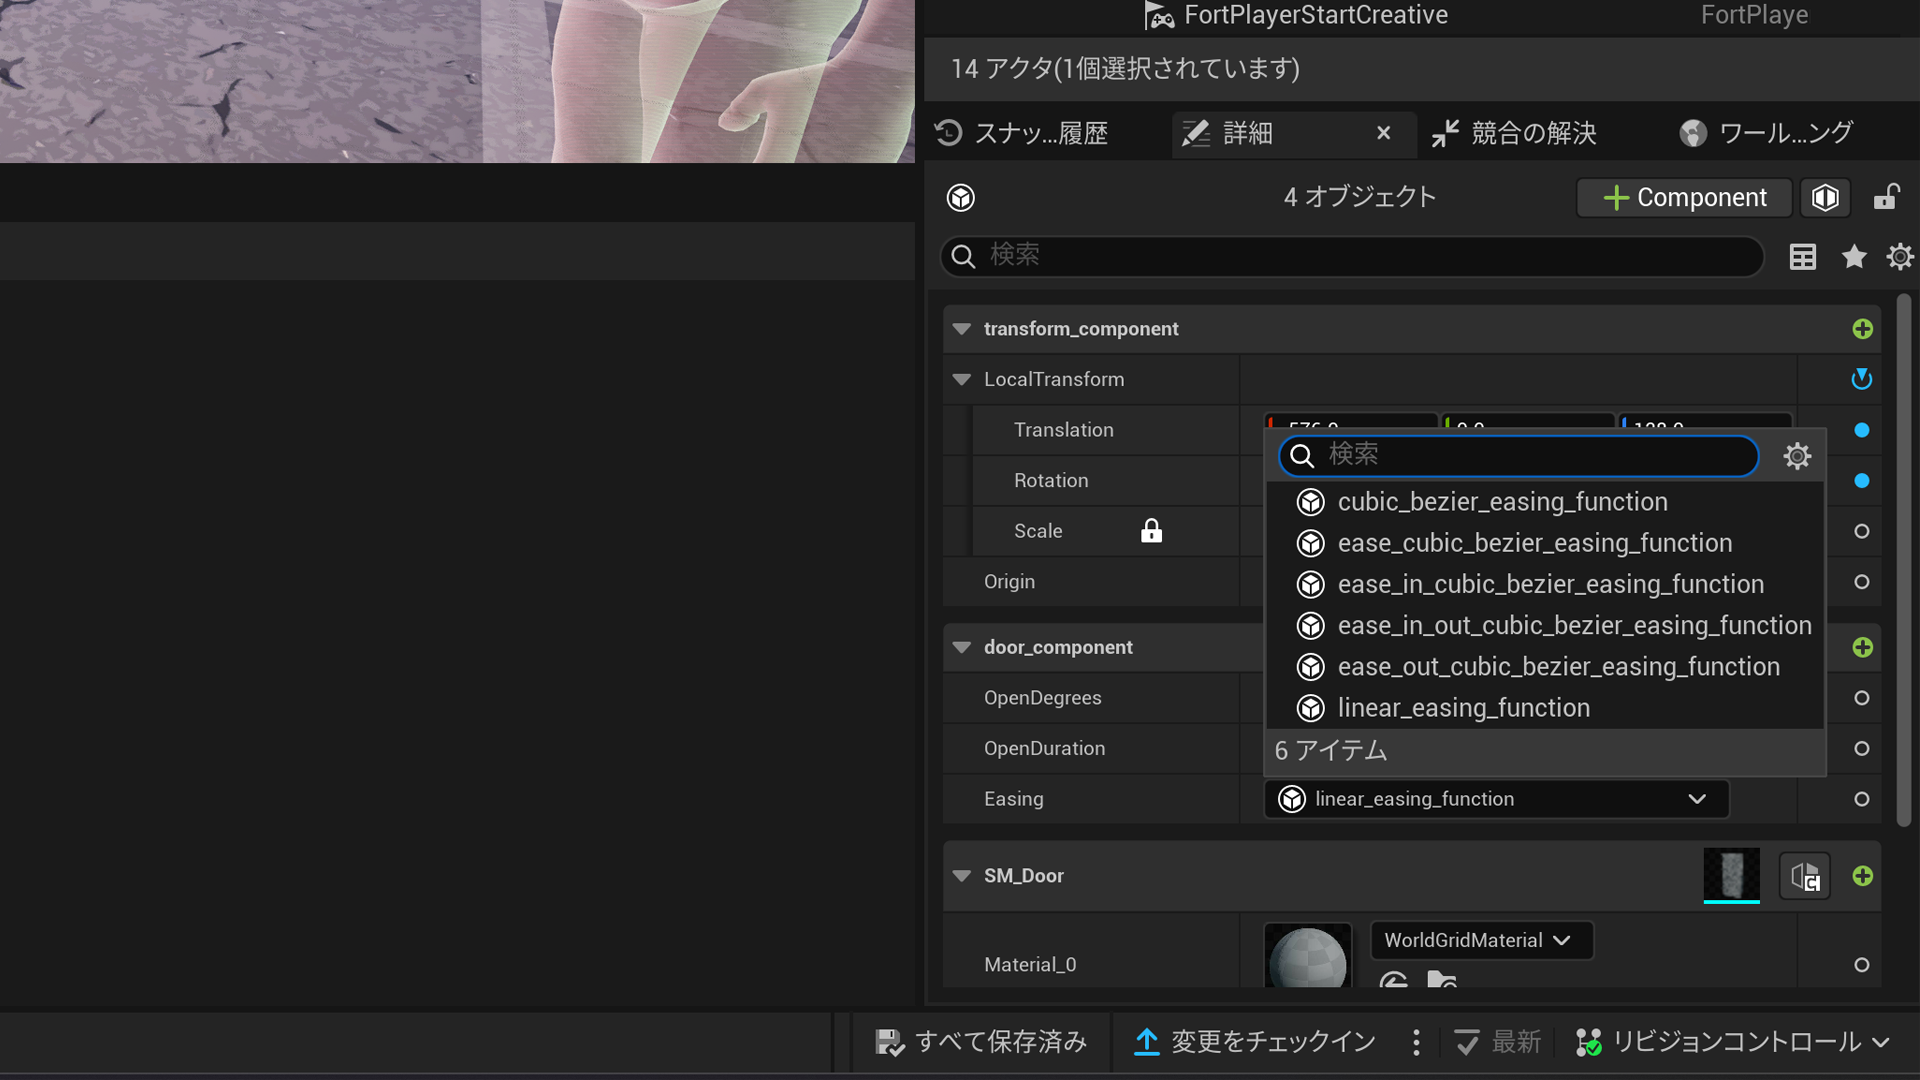
editableのマテリアル
material_test_device := class(creative_device):

    @editable
    Material:material = M_UI_Color{}

    @editable
    MaybeMaterial:?material = false
Verseデバイスやシーングラフでは、editableとして公開することもできます。
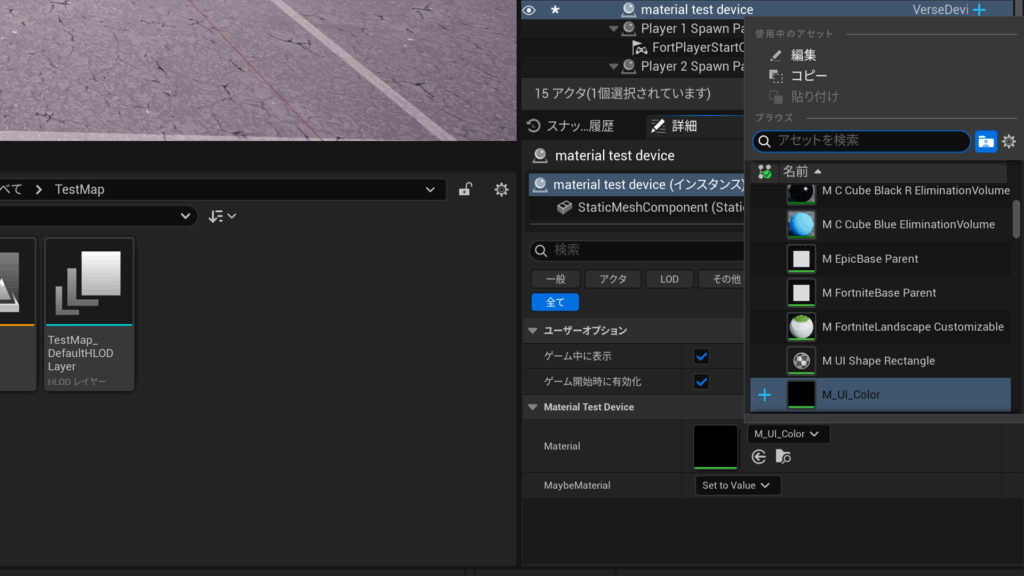
実際に選択するとこのように、マテリアルのアセット一覧を選択できるようになります。